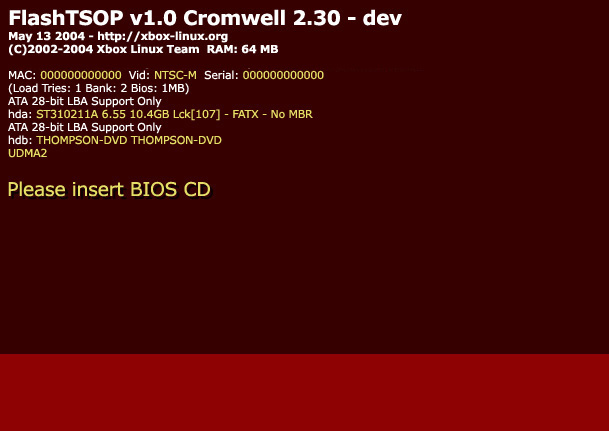
| 1.) Connect the
A/V and power cables and power on your XBOX console. You should see a
screen similar to the one shown below:
NOTE: Some of the values may be
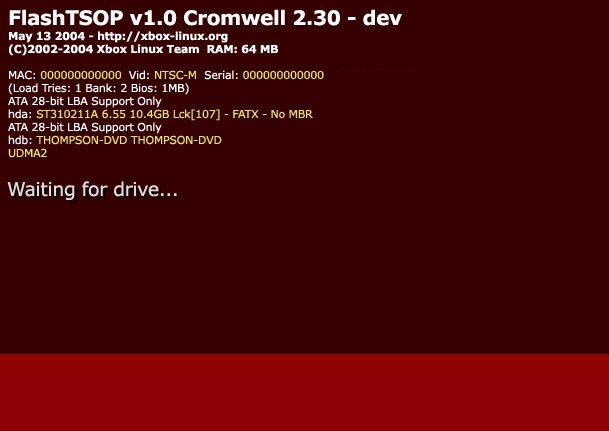
different, however please observe the sixth line that reads: 2.) The DVD-ROM drive should eject and the console will prompt for the BIOS CD. Insert your newly created BIOS CD and press the eject button to close the DVD drive. Your XBOX will wait until the DVD drive is able to read the disc and you should see this screen:
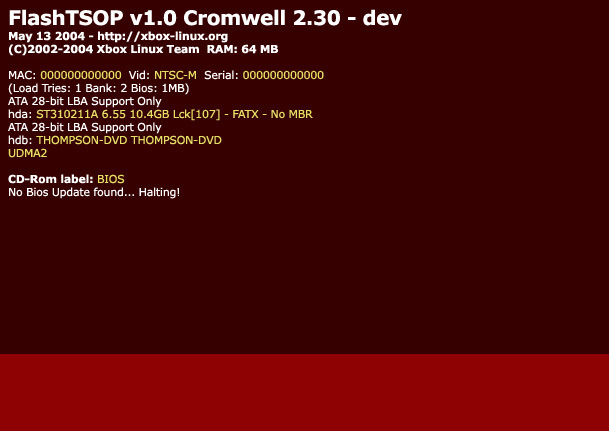
3.) If the XBOX experiences any problems while reading the disc, you will probably see this screen or similar:
In any case, if you receive a read error or the XBOX cannot and find a BIOS image and the flashing procedure does not begin, please check the following:
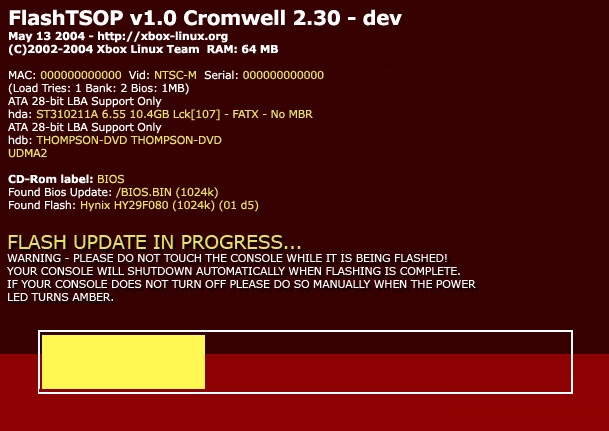
You can try re-burning the BIOS CD and restarting the console and try the flashing procedure again if it does not recognize the CD or the BIOS image file. 4.) If you do not see an error, you will see the BIOS flash procedure begin, pictured below:
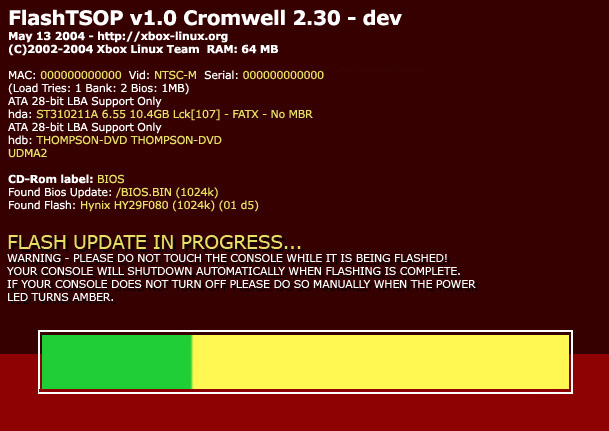
The XBOX is now erasing the onboard BIOS chip in preparing to write your new BIOS image on the CD you created. WARNING: It is imperative that you do not touch the XBOX in any manner (i.e. ejecting the DVD drive, powering off, etc.) If the BIOS flashing procedure is disturbed your XBOX may be destroyed. 5.) After the XBOX has erased the BIOS chip, it will begin flashing your BIOS of choice from the CD. This process is shown below:
When the green bar reaches the end, the flashing procedure has finished. Your XBOX should power down automatically. Congratulations! Your XBOX is now successfully flashed. Assuming you have followed the instructions thus far, your XBOX console should now boot successfully from your new BIOS. You may remove the BIOS CD as it is no longer needed.
|